In this topic you will learn how to create and manage transcoding profiles for use in the Video Cloud Live module.
The Live module can be used to broadcast live events to both desktop and mobile devices. When creating a live event, publishers are required to select a transcoding profile to use for the live event. Each transcoding profile contains a set of transcode settings. The Live module offers the ability to edit and create new transcoding profiles. This allows publishers to edit their transcoding settings, save these settings, and then re-use them in the future by selecting the profile from a drop-down list.
Note: Live streaming support is available only for Video Cloud Pro and Enterprise publishers.
If you are looking to quickly get started broadcasting a live event, check out the Quick Start: Using the Live Module to Broadcast a Live Event topic. For complete documentation on the Live module, see Creating and Managing Live Events using the Video Cloud Live Module. For a list of all the options available from Brightcove for delivering live streaming video, see Delivering Live Streams.
Transcoding profiles for the Live module can be created by:
Creating a transcoding profile by editing an existing profile
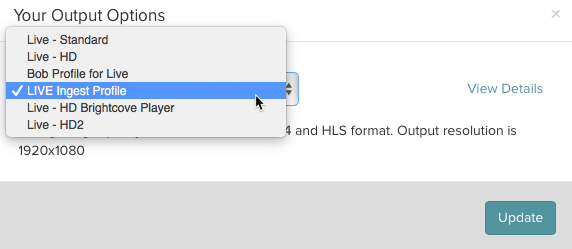
When creating a new live event using the Live module, and after entering an event name/description and selecting a player, the Live module will prompt you for the output options to be used for the live event.
Note: The transcoding profiles that appear are based upon your Live module subscription plan.
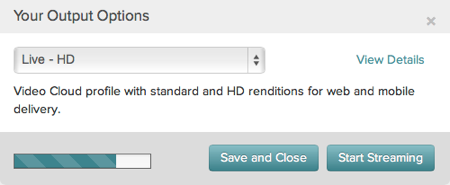
Clicking the View Details link will display the rendition settings for the selected profile.
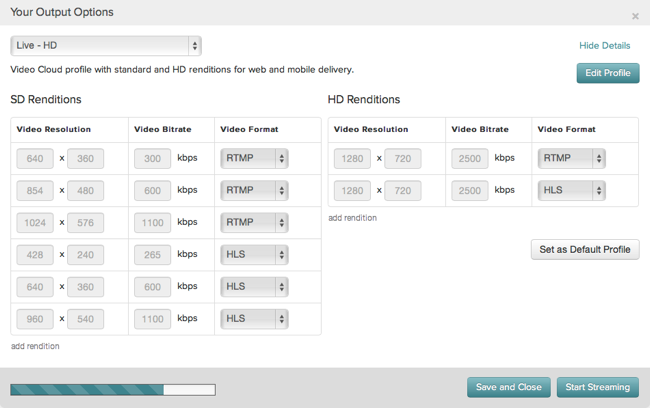
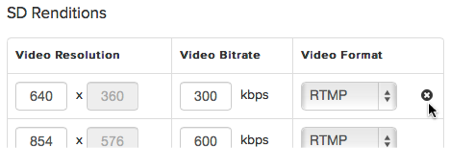
To edit any of the rendition settings, click the Edit Profile button. While in edit mode, you can edit the profile name, description, or any of the rendition settings. To add a rendition, click the add rendition link. To set a profile as the default, click the Set as Default Profile button. The next time you create an event, this profile will be set as the default profile in the output options. To delete a rendition, click the black X next to the rendition and then the Delete button to confirm the deletion.
Note: By default, all of the Live module output profiles create RTMP renditions which are not supported by the Brightcove Player. If you are publishing your live event using a Brightcove Player, Brightcove recommends that you create a custom profile and either delete the RTMP renditions or change the RTMP renditions to HLS renditions.
When you are done making your changes, click Save to save the changes to the selected profile. Click Save As New to save these settings as a new profile.
Creating a new ingest profile
Custom ingest profiles for use in the Live module can also be created as part of the account settings in Video Cloud Studio. Creating a custom ingest profile will give you more control over the live stream settings than what is exposed when using the Live module UI. For complete details on creating custom ingest profiles, see Managing Ingest Profiles. Brightcove recommends duplicating an existing profile and then editing it as appropriate.
For the profile to appear in the Live module, the profile should not create still or poster images ( remove the "media_type": "image" section). Also, each rendition should include "live_stream": true.

After the profile is saved, it should appear as an option inside the Live module.