This topic covers the process for exporting your video from Camtasia for Mac to an H.264 source file. This document covers Camtasia for Mac version 2.
Camtasia for Mac is often used for creating screencasts for tutorials. Creating high quality screencasts with clear, crisp, and legible text is especially challenging when creating software tutorial videos. To learn best practices and tips for creating and publishing high quality screencasts, see the document Creating and Publishing High Quality Screencasts.
There are many settings that can be configured when exporting your file from Camtasia. This topic outlines the process and settings we used when creating the training videos that appear on brightcove.com. Note that when we recorded these videos, we recorded a custom region sized to 1280 x 720.
Exporting from Camtasia for Mac
- Select Share> Advanced Export...
- Choose a name and location to save the exported file.
- From the Export list, choose Export to Quicktime MPEG-4.
- Click the Options... button.
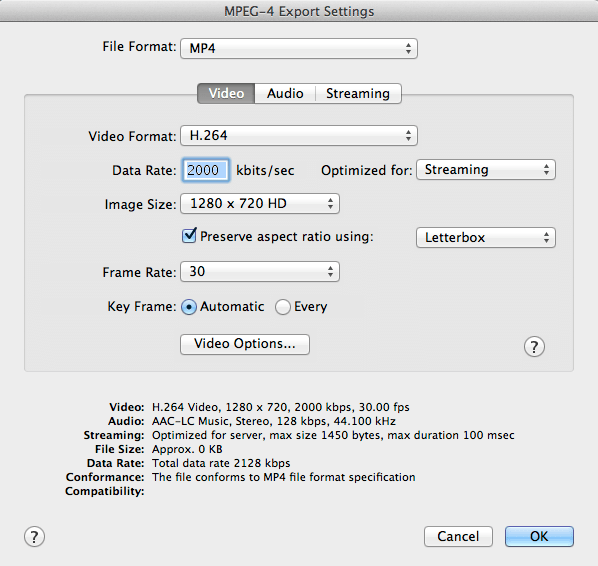
- Configure the Video export settings using these recommendations.
- File Format: MP4
- Video Format: H.264
- Data Rate: We have seen good quality exports when using settings between 300 kbps and 1200 kbps. A higher bit rate (1200 kbps) is recommended when your screencast includes a talking head and/or more complex animations. Keep in mind that this setting is usually a target bit rate and your bitrate will vary depending on content. Typically, the bitrate when showing just the screen will be a lot lower than when there is a talking head. Our training videos have a combination of screen capture and talking head so we chose a larger setting here.
- Image Size: We recommend you export at the same settings you used when recording. For example, if your project was sized and recorded at a resolution of 1280 x 720, export at that size to avoid having the screencast resized which can result in a loss of quality.
![]()
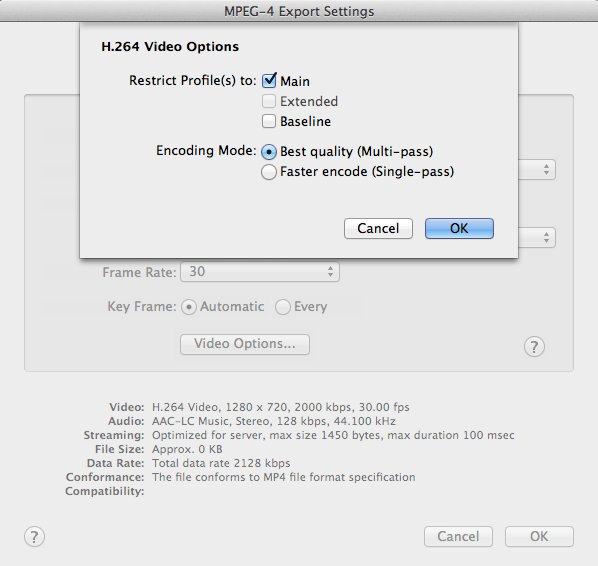
- Click Video Options... to configure additional video options.
![]()
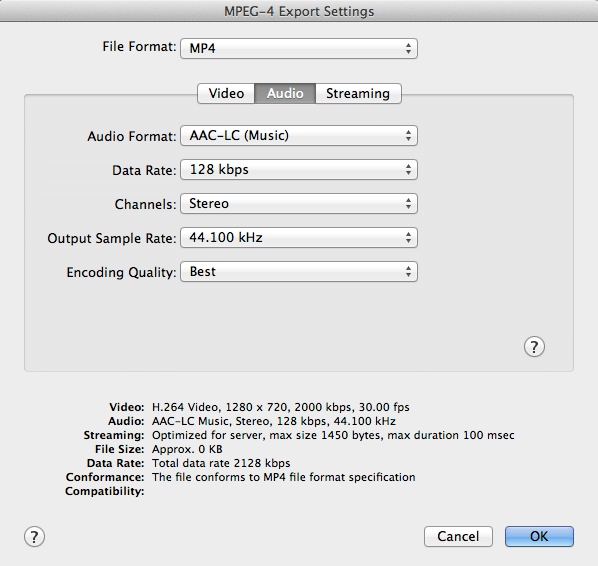
- Configure the Audio export settings using these recommendations.
![]()
- Configure the Streaming export settings using these recommendations.
![]()
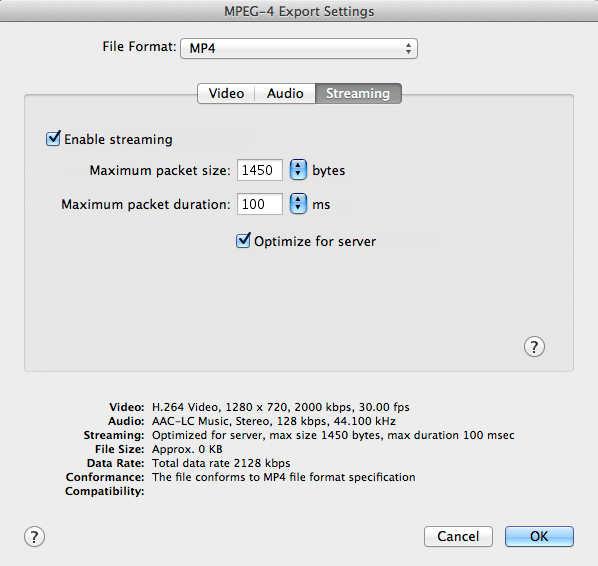
Note that the above settings are recommendations and you may need to alter your settings to provide a quality viewing experience to your end users.